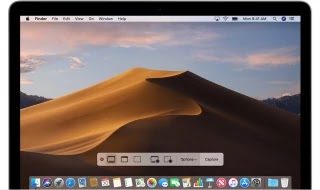
How to Screenshot (Print Screen) on Mac OS X
How to Screenshot (Print Screen) on Mac OS X. There are several ways you can do to take Screenshot or Screen Capture on Mac OsX.
- command + shift + 3, to take a screenshot of the entire screen.
- command + shift + 4, release, then select the area by holding left click, to take screenshots in certain areas.
- command + shift + 4 + space, release, then select / click Windows, to take screenshots in certain windows.
By default, the screenshot results will be saved in the .PNG format and stored in the DESKTOP screen. Of course this will be a little annoying because it will make the screen a bit 'dirty' if we take a lot of screenshots. Well, it's good we save it in a certain folder on the desktop. Changing the default location of the screenshot storage folder needs to be done in several stages.
1. Create a new folder on the desktop, for example we name it ‘Screenshots‘.
2. Open the Terminal window, this app can be found in Finder> Applications> Utilities> Terminal.
3. After the Terminal window opens, type the following command:
defaults write com.apple.screencapture location / Users / username / desktop / foldername
The red one can be replaced according to the desired username and folder name. In this example we use the folder name 'Screenshots'.
4. Then type the following command:
killall SystemUIServer
Then just close The maximum windows and screenshot location have moved to the new folder. Good luck!


Comments